 ShopAssist
Adjust the widget appearance
Match the widget to the merchant's brand and place it on the storefront.
Open the client's dashboard from the partner portal, then go to Testing Tool → Appearance. Set this up before you take the shop live.
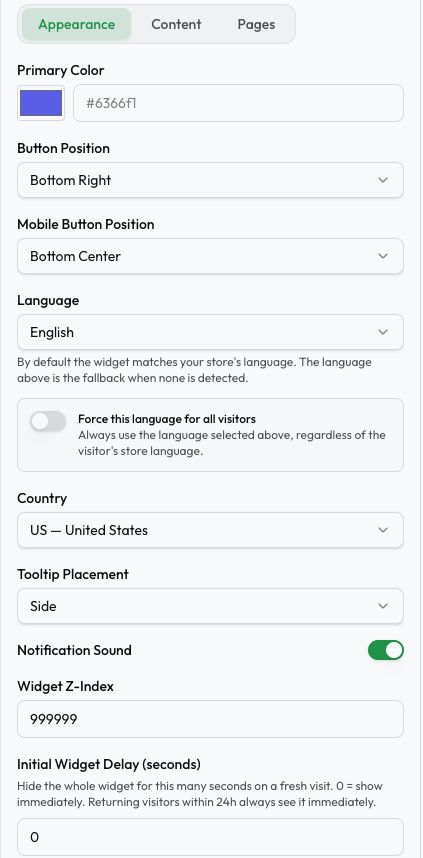
Match the brand
Enter the merchant's approved brand colour in Primary Color. Check the button and open widget in the preview to make sure text and icons remain readable.
Place the button
Choose Button Position for desktop and Mobile Button Position for mobile. Check both against the store's navigation, cart controls, cookie banner, and other floating buttons. The widget should be easy to find without covering a shopping action.
Use Tooltip Placement to keep its message visible beside the button. Review the localised text in each store language, since longer messages may need more room.
Choose when it appears
Set Notification Sound to match the merchant's preference. Use
Initial Widget Delay (seconds) if the merchant wants the widget to appear
after the store's cookie banner rather than at the same time. 0 shows the
widget immediately.
The delay is a timer, not a consent signal. A visitor who takes longer than the delay still sees both at once, and a returning visitor within 24 hours sees the widget immediately. If the widget must appear only after an explicit consent event, contact support.
Do not raise Widget Z-Index to place the widget above a cookie banner. Consent controls must stay usable.
Save and check the storefront
Select Save settings. Check the homepage and a product page on desktop and mobile, including the widget's open and closed states. Confirm that the button and message are readable and do not cover important controls. Show the result to the merchant before launch.
Last updated on